Interrupts and Eggs: A Masterclass in the Feltotem's Fall Challenge
Don't let the Feltotem's Fall challenge worm its way into your head! Our comprehensive guide to Tugar Bloodtotem breaks down the essential dance of interrupts and target swapping.
NoobSidious
2/25/20264 min read
Greetings, Denizens of the Azeroth Galaxy!
Today, we face Tugar Bloodtotem and his mighty worm, Jormog the Outcast, in the Feltotem's Fall challenge. This isn’t just another encounter; it’s a dance of interrupts, crowd control, and target swapping that will have you managing both bosses at the same time. The challenge requires quick thinking, perfect timing, and precise execution just the way I like it!
So, grab your gear, stock up on your cooldowns, and let’s dive in. This fight is all about minimizing damage intake and ensuring you don’t let Tugar’s Fel Burst or Jormog’s Sonic Screech ruin your day.


Available Classes for the Tugar Mage Tower Challenge
Windwalker Monk
Beast Mastery Hunter
Discipline Priest
Destruction Warlock
For this fight i used Windwalker Monk

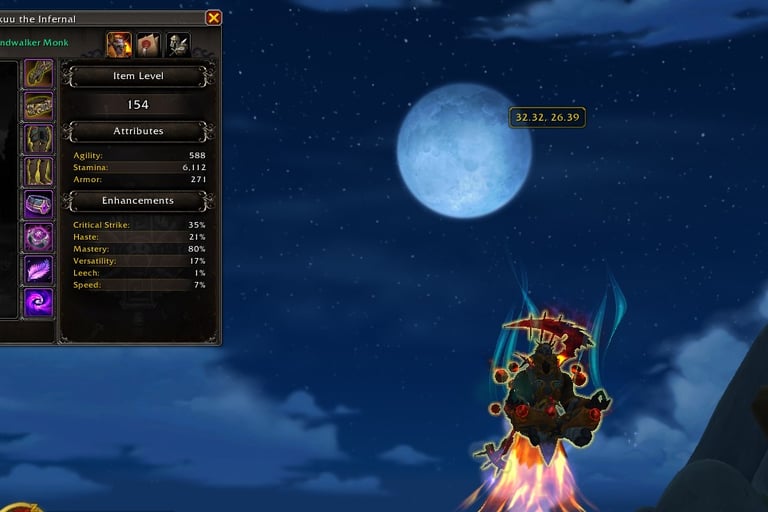
Gear
Warwithin - Prepatch - Full heroic
Lvl 154
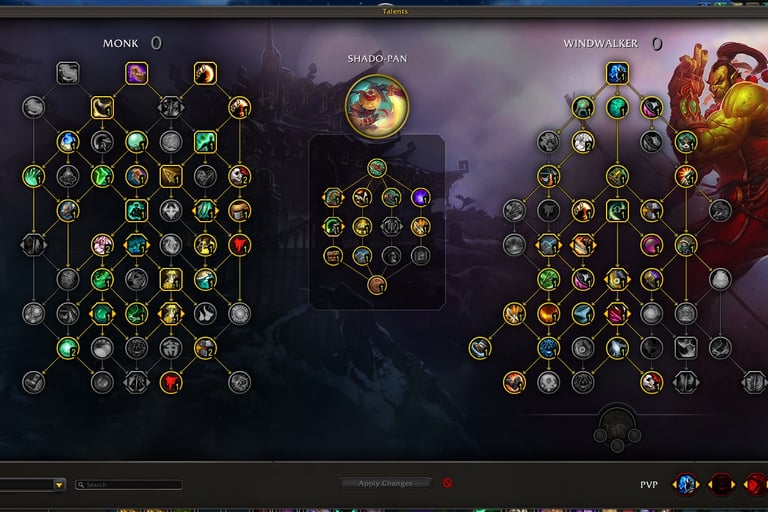
Talents - Mythic + style focused on CC and Mobility.
If the following import does not work, check M+ build on WoWHead. It will probably be similar.
Key Mechanics to Survive the Dance
In the Feltotem’s Fall challenge, managing both Tugar and Jormog at once is the key to success. Here are the main mechanics you need to focus on to get through this encounter:
Interrupt Tugar’s Fel Burst. This ability deals massive damage that scales up. If you don’t interrupt it, you’ll find yourself in a world of hurt. Use your main interrupt (e.g., Muzzle, Spear Hand Strike) every time it’s cast to avoid the pain.
Crowd Control on Tugar during his Earthquake cast will prevent the spawn of a Bile Spitter Egg. However, the rocks will still fall and deal damage, so be prepared to dodge them. If the Fel Surge Totem spawns, kill it immediately to avoid being stunned.
Interrupt Jormog’s Sonic Screech if you’re a caster or healer. If you don’t, you’ll get locked out of your spell school, making it nearly impossible to keep up with healing or damage.
Fel Hardened Scales on Jormog: He starts with 9 stacks of this buff, which reduces his damage taken by 90%. You’ll need to kite Jormog into the falling rocks from Tugar’s Earthquake while he’s burrowed to remove these stacks. The more stacks you can remove, the easier Phase 2 will be.
Phase Breakdown: Mastering the Fight
Phase 1: Tugar & Jormog
In Phase 1, you’ll be fighting both Tugar and Jormog at the same time. Tugar stays on the surface, while Jormog periodically burrows. Here’s what you need to do:
Fel Burst (Tugar): Interrupt this ability immediately. It deals massive damage that will quickly add up. Use your interrupts on cooldown to keep yourself alive.
Earthquake (Tugar): Falling rocks will deal damage and spawn a Bile Spitter Egg. If the egg hatches, a Fel Surge Totem will spawn, which will stun you. Kill the egg/totem immediately to avoid a wipe.
Sonic Screech (Jormog): Interrupt this cast to avoid getting locked out of your spell school. If you’re a caster or healer, Sonic Screech can easily end your run if you don’t stop it.
Fel Hardened Scales (Jormog): Kite Jormog into the falling rocks to remove Fel Hardened Scales. This will make Phase 2 much easier.
Phase 2: The Kill Order
Once Tugar dies, Jormog will go into a frenzy, increasing his damage by 150%. Here’s the strategy:
Bring Both Bosses Down: You want to bring both bosses down equally. Ideally, Jormog should have 0 stacks of Fel Hardened Scales and low health when Tugar dies.
Don’t Kill Tugar Too Early: If you kill Tugar too soon, Jormog will likely one-shot you with his Sonic Screech. Keep him alive until Jormog is ready to be taken down.
In Phase 2, your goal is to finish off Jormog before he overwhelms you with his increased damage output.
Class-Specific “Cheat Codes”
Certain classes have unique advantages for this fight. Here are some tips tailored to specific specs:
Destruction Warlock: If your interrupt is on cooldown, use Fear or Mortal Coil on Tugar. Your Voidwalker can tank Tugar while you focus on the mechanics.
Beast Mastery Hunter: Keep Misdirection on your pet to ensure Tugar focuses on your pet. Use Exhilaration if Tugar’s burst gets through. Intimidation is a great backup interrupt for the Fel Burst.
Windwalker Monk: Paralysis can be used to stop Fel Burst if Spear Hand Strike is down. Leg Sweep is also great for clearing small adds that spawn.
Discipline Priest: Use Psychic Scream to interrupt Tugar’s cast. Keep Shadow Word: Pain on both Tugar and Jormog for consistent healing through Atonement.
Final Thoughts: Conquer Feltotem’s Fall
The Feltotem’s Fall challenge tests your ability to manage interrupts, kite effectively, and DPS both Tugar and Jormog at the same time. Here’s what you need to remember:
Interrupt Tugar’s Fel Burst on cooldown.
Interrupt Sonic Screech to avoid spell lockouts.
Kite Jormog into falling rocks to remove Fel Hardened Scales.
Don’t kill Tugar too early, ensure Jormog is ready before taking him down.
With the right strategy, you’ll walk away with unique transmog rewards and, of course, the Soaring Spelltome Mount.
✨ Legendary Screen-Free Reset ✨
The Legendary Screen-Free Reset brings together fun, challenging, and themed word search puzzle books designed for relaxation, brain training, and entertainment.
And you will also support this project.
Perfect for adults, teens, and older kids, these puzzle books are created with easy-to-read print, making them accessible to casual solvers and puzzle lovers alike.
Whether you’re looking for a thoughtful gift, a screen-free activity, or just a way to unwind, the Legendary Screen-Free Reset is your best pick.
LIVE LONG, PLAY WOW

✎ᝰ About the Author
Noob Sidious is a veteran World of Warcraft player, husband, and father. With a few years of experience working in technology, including QA engineering, programming, and data analysis, Noob Sidious brings a unique blend of gaming expertise and tech-savvy humor to the WoW community. Known for his sarcastic wit, he turns even the most epic wipe into a legendary tale. When he's not dominating Azeroth or cracking jokes, you’ll find him balancing family life and crafting content that entertains, educates, and connects WoW players, all while embodying the Emperor’s style.


❤️ Maintaining this PROJECT takes more mana than a Disc Priest in a 10-minute raid encounter. If you’ve found my guides helpful, AND LIKE THE PROJECT, consider tossing a Major Mana Potion (or some real-world gold) my way to keep the servers running!
© 2025 WoWPrime. All rights reserved. Live Long, Play WOW
⚠️ Disclaimer
wowprimer.com is an independent, fan-driven project created for entertainment, commentary, and educational purposes. We are not affiliated with, endorsed by, or officially connected to Blizzard Entertainment, World of Warcraft, or any other companies mentioned on this site, unless explicitly stated.
All trademarks, copyrights, logos, names, and images are the property of their respective owners. Any use of these elements is made under Fair Use principles for the purposes of review, commentary, news reporting, and non-commercial fan expression.
Some articles, reviews, or recommendations may contain affiliate links or sponsored mentions. If you click on these links and make a purchase, we may earn a small commission at no additional cost to you. We only feature products, services, or experiences we genuinely believe may be of interest or value to our readers.
All content is provided “as is” for informational and entertainment purposes only and should NOT be considered official advice, endorsement, or representation of any third-party company.
SUBSCRIBE
We accept USDT or any token on the BNB Smart Chain.