WoW Midnight Maisara Caverns Guide, Boss Tips for Mythic+
WoW Midnight Maisara Caverns guide for Mythic+ and Season 1. Learn the key boss mechanics, trash interrupts, tank and healer tips, and the fastest ways to avoid throwing your key into the abyss.
NoobSidious
3/27/202610 min read
Greetings, Denizens of the Azeroth Galaxy!
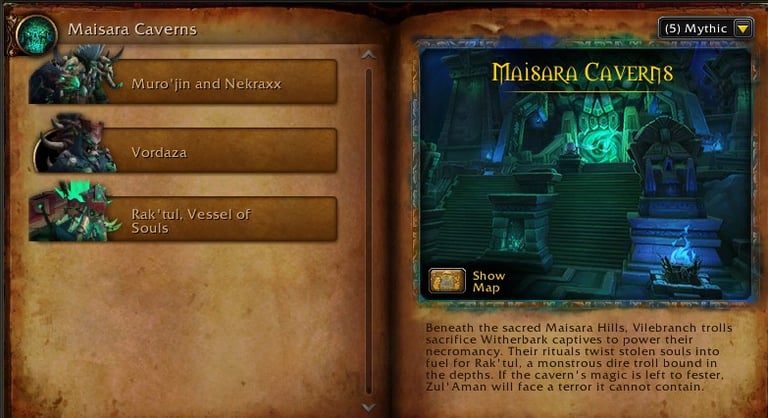
Maisara Caverns is one of the Midnight Season 1 Mythic+ dungeons, and it lives exactly where trouble loves to grow, beneath the sacred Maisara Hills in Zul'Aman, where Vilebranch necromancy, stolen souls, and one very angry troll abomination are all having a terrible day together. Blizzard describes the dungeon as a ritual site where Witherbark captives are sacrificed to empower Rak'tul, the final monstrosity waiting in the depths.
💭Beneath the sacred Maisara Hills, Vilebranch trolls sacrifice Witherbark captives to power their necromancy. Their rituals twist stolen souls into fuel for Rak'tul, a monstrous dire troll bound in the depths. If the cavern's magic is left to fester, Zul'Aman will face a terror it cannot contain.
This is not a polite dungeon. It is a place full of soul magic, traps, roots, bridge chaos, and one boss who throws your whole team into a panicked jog of shame. This Noob approves the drama, but not of missing interrupts while pretending it was lag. 😏
🌀The Innkeeper’s Note (TL;DR)
In Maisara Caverns, if your group interrupts on time, handles movement cleanly, and respects the dangerous overlap moments, the run feels manageable. If not, the place becomes a necromantic group project where everybody contributes pain. The key pressure points are the dual-boss opener with traps and split damage, Vordaza’s phantom overlap management, and Rak'tul’s bridge gauntlet plus totem cleanup.
Interrupts matter early and often. Trash casts and boss casts both punish lazy kicks.
Do not ignore Lost Souls. Their explosions and roots are excellent at ruining clean pulls.
The first boss pair is not a tunnel fight. Split damage correctly, or the ending gets ugly.
Vordaza rewards calm movement. Overlap phantoms with control, not panic.
Rak'tul punishes slow reactions. Bad totem placement, bad puddle placement, and slow bridge returns all hurt.
Healers need a real plan. Healing absorbs, passive damage, and burst windows stack up fast.
Tanks set the tone. Face danger away, press defensives before the hit, and keep the battlefield tidy.

⚡ Maisara Caverns Quick Guide!
✂️📋Copy-paste ready

📍Maisara Caverns Location
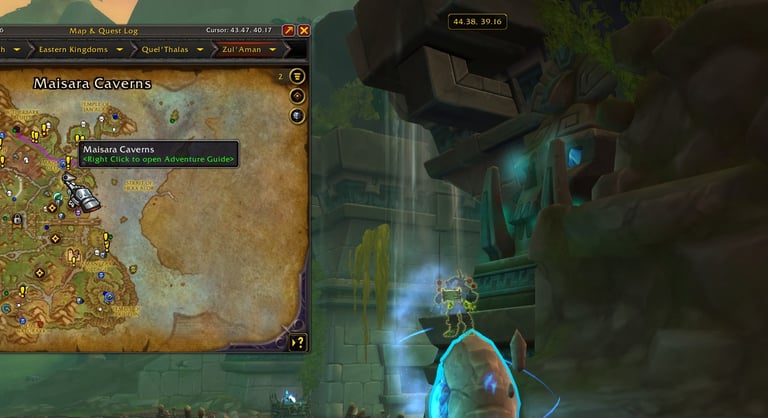
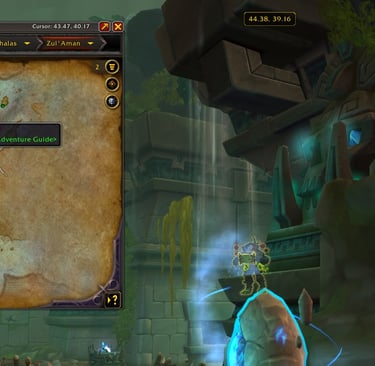
The dungeon sits in Zul'Aman and leans hard into the darker side of the zone’s story.
Head to the Maisara Deeps in northern Zul'Aman. Coordinates below:
Trash, Route Control, and the Things That Actually Wipe Keys
Trash in Maisara Caverns is not decoration. It is there to slap groups that think only bosses deserve respect. The opening area also has a small objective gate, you need to free Prisoners, and that can only be done out of combat, so sloppy pulls near cages waste time immediately. The first half of the dungeon also offers route perks like Hearty Vilebranch Stew, Ritual Concoction, and usable Freezing Traps, with a recent hotfix extending Ritual Concoction to 30 minutes, making it persist through death, and reducing its damage contribution by 40%.
For your readers, the clean rule set stays simple. Avoid frontals, interrupt casts, stack enemies when safe, stun them, and burn them together. Healers should clear curses, bleeds, and healing absorb pressure before it snowballs. Tanks should turn frontals away from the group and use defensives before large pulls become a live reenactment of despair.
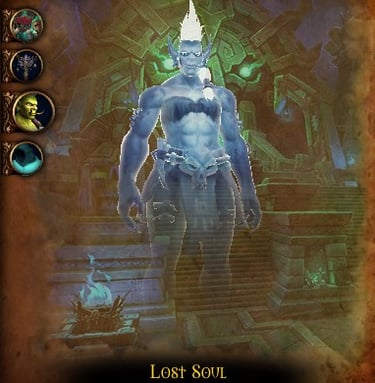
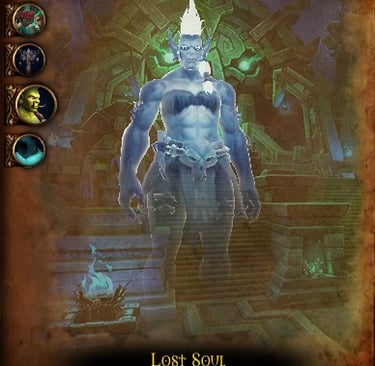
A few trash enemies deserve special attention. Dread Souleater spreads heavy pressure with Necrotic Wave and adds a healing absorb, while Keen Headhunter can punish players with Hooked Snare and spear pressure. Hulking Juggernaut hits tanks with Rending Gore, and the packs near Vordaza add more trouble through tank busters, reanimation casts, magic dots, and dangerous line attacks. Lost Souls in the later room can also explode on contact and root players with Cries of the Fallen, which is exactly as rude as it sounds.
Master rule: if the room contains ghosts, traps, and necromancers, and your group chooses to stand still and “see what happens,” then congratulations, you have unlocked educational suffering.
Abilities that Remove Bleed
Bleed effects are typically considered "physical" and cannot be dispelled by standard magic cleanses. Only a few specific tools exist to remove them:
Evoker: Cauterizing Flame is the only targetable, class-wide ability that explicitly removes all bleed effects (along with poisons, diseases, and curses) on a 1-minute cooldown.
Dwarf & Dark Iron Dwarf:
Paladin:
Blessing of Protection (BoP) removes physical debuffs, including bleeds, from the target.
Divine Shield (Bubble) clears all debuffs on the Paladin
Mage
Ice Block removes all debuffs, including bleeds, from the caster.
Abilities that Remove Curse
Several classes have dedicated abilities to dispel Curse-type debuffs from allies:
Mage: Remove Curse is available to all specs.
Druid: Remove Corruption removes Curses and Poisons. Restoration Druids use Nature's Cure, which adds Magic removal to the same button.
Shaman: Cleanse Spirit removes Curses. Restoration Shamans upgrade this to Purify Spirit, which also removes Magic effects.
Evoker: Cauterizing Flame removes Curses in addition to its bleed-cleansing properties.
Most other healers (Priests, Paladins, Monks) cannot remove Curses unless they use a specific racial ability (like Dwarf) or an immunity.
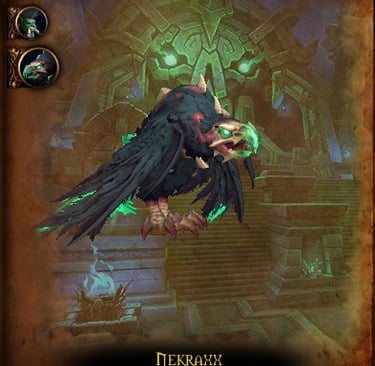
How to defeat
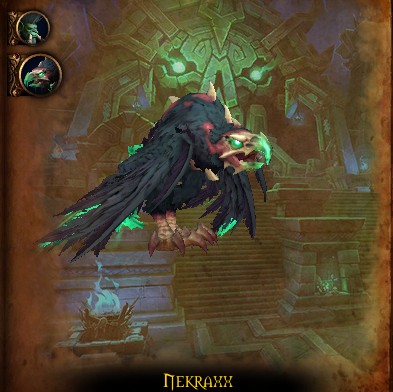
Muro’jin and Nekraxx
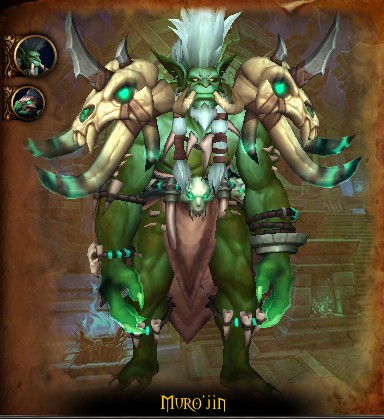
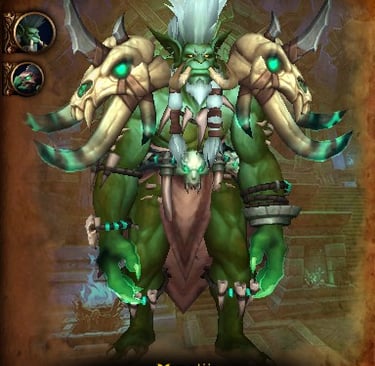
Muro'jin and Nekraxx open the dungeon by testing whether your team can think while moving. This is a two-boss fight where damage needs to stay balanced. If Nekraxx dies first, Muro'jin can revive the pet (No, you can't stun this hunter in mid cast.... I know). If Muro'jin dies first, Nekraxx gets stronger through Bestial Wrath, which means the end of the fight becomes much uglier than necessary.
The trap mechanic is the heart of the encounter. Avoid Freezing Traps unless Carrion Swoop is targeting you. In that case, stepping on the trap is the correct play because it stops the swoop and stuns Nekraxx instead of letting the bird turn your team into target practice. Outside of that moment, traps are just little squares of regret.
Tanks need to be ready for Flanking Spear, especially after the leap. Use a defensive, do not get knocked into a trap, and then pull the bosses back together so your cleave stays useful. If Barrage targets a player, that person should stand still so the rest of the team can move out cleanly instead of playing chase with a frontal channel. Healers should also watch the group for Infected Pinions, because fast dispels reduce a lot of avoidable misery.
The last little sting in the fight comes when Muro'jin dies. His pets become much more dangerous, so tanks should already be ready with extra mitigation instead of discovering danger one global too late. This fight is not hard because the mechanics are mysterious. It is hard because people panic at the exact moment they should get tidy.
Lust at pull if available.
Step on the Freezing Traps if you get targeted by Carrion Swoop, otherwise dodge all traps.
Tanks - Boss will leap away and cast Flanking Spear, use defensives
If you get targeted by Barrage stand still so the team can move out of the way.
When Muro’jin dies, Tanks use Defensives, and his pets get Bestial Wrath.
Heals dispel Infected Pinions.
How to defeat
Vordaza

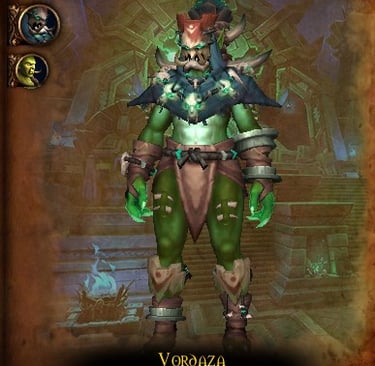
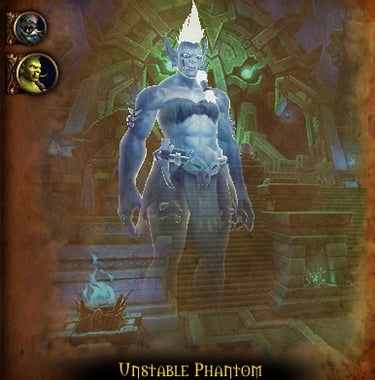
Vordaza is where the dungeon starts acting like it wants to see your healer sweat. The fight revolves around Wrest Phantoms, Unmake, Drain Soul, and the huge center channel from Necrotic Convergence . This is a fight about pacing, because doing the right mechanic too messily is almost as bad as ignoring it.
When Wrest Phantoms spawn, you want the fixating adds to collide and despawn, but not all at once without thinking. Their explosions leave a short damage-over-time effect, and that overlaps badly with the boss’s passive pressure. So the correct play is controlled overlap, not frantic sprinting in every direction like a headless murloc wearing plate armor. Use CC if needed, pair them carefully, and let the damage settle before making the next collision.
Tanks should use a defensive for Drain Soul, while everyone else stays ready to dodge the frontal beam from Unmake. Then comes the real burn window. When Vordaza moves to the middle for Necrotic Convergence , your group should swap from survival mode to destruction mode. Heavy healing is needed here, but so is strong damage, because breaking the shield quickly shuts the whole event down before it drags on too long.
This boss is all rhythm. Overlap cleanly, dodge cleanly, burst cleanly. When groups fail here, it is usually because they do the right idea in the messiest way possible.
The boss will spawn 4 phantoms, fixating the team - Wrest Phantoms. Overlap them to despawn.
Avoid Frontal Beam - Unmake.
Avoid floating orbs.
Heavy healing when the boss gets to the middle with Necrotic Convergence
Burst DPS when he gets to the middle with Necrotic Convergence
How to defeat
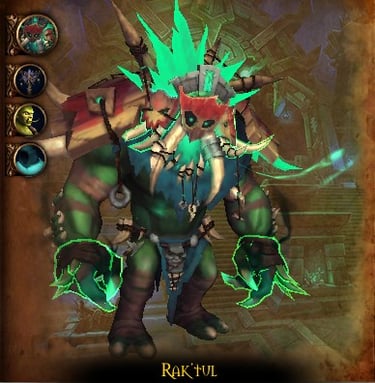
Rak’tul, Vessel of Souls


Rak'tul closes the dungeon by asking one final question, how well does your group behave when everything goes wrong at once? The answer should ideally be “surprisingly well,” because this fight has passive damage, puddle control, totem cleanup, knockback pressure, and a forced run down the bridge while the souls of the damned try to root you for entertainment.
Before the boss itself, the bridge can already punish the group. After Vordaza, there is a mini-boss at the far end whose channel sends dangerous shadow orbs bouncing down the bridge, dealing heavy damage and knocking players back if they get hit. In plain language, dodge first, complain later.
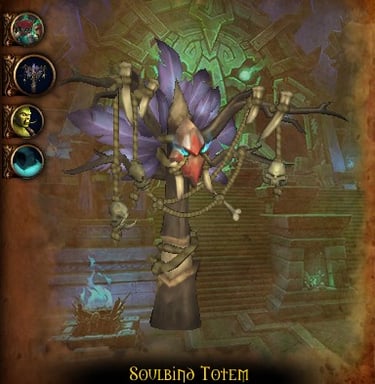
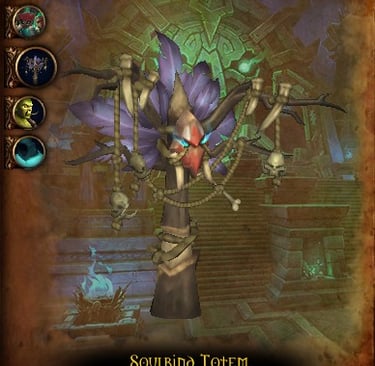
On Rak'tul, lust on pull is a perfectly sensible plan. Tanks should place puddles away from the team, because Spiritbreaker combines a major hit with a puddle drop and knockback pressure. Defensive cooldowns belong here, not in your memory after the wipe. The boss also targets three players with Crush Souls, leaving behind Soulbind totems. Those totems need to die fast, and the marked players should try to drop them close enough for efficient cleave without smashing the whole group in the process.
The signature mechanic is Soulrending Roar. The whole team gets sent down the bridge and has to sprint back while Withering Soul ramps damage higher and higher. Along the way, avoid Lost Souls and their Cries of the Fallen root, interrupt or crowd control the Malignant Souls, and get back quickly. That route is not just survival; it also gives you a stacking buff that helps finish the fight faster. So yes, run like your key depends on it, because it does.
Even Emperor Noob Sidious respects this mechanic. Not because it is kind, but because it gives every player a chance to reveal whether they are a heroic champion or a decorative traffic cone.
Lust at pull if available.
Tank places the Puddles away from the team.
The boss will leap on 3 team players and leave totems behind - Crush Souls.
Don't get crushed by the leap.
Avoid green circles, Spiritbreaker.
Destroy Totems - Soulbind
Soulrending Roar - Boss will send the entire team down the bridge, CC and Kick the big adds casting a shield and run as fast as possible to boss.
Dodge all Lost Souls on your way - Cries of the Fallen
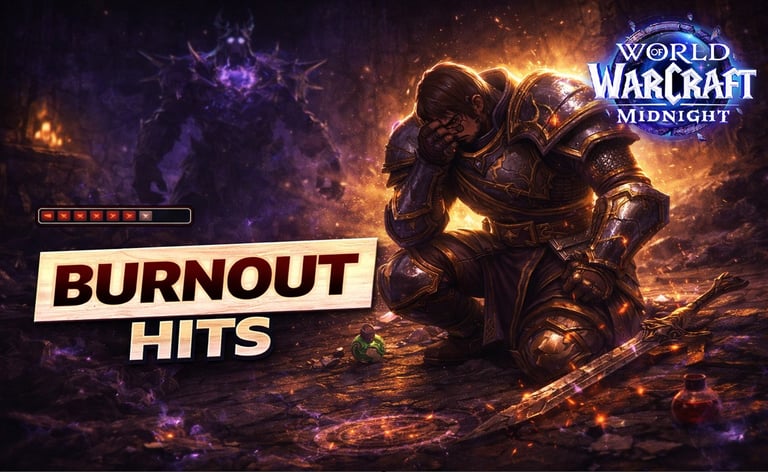
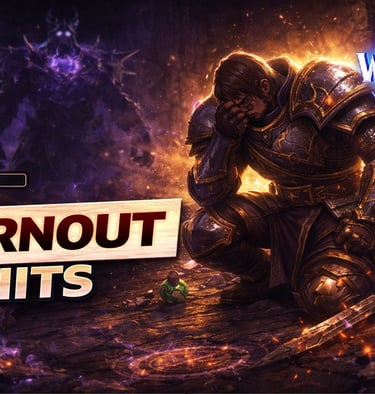
Handling the Burnout: How to Manage Failures
The Midnight Nemesis and the Mage Tower fights are not tests of your gear; they are tests of your patience and muscle memory.
Expect to wipe.
A lot.
Here is how to stay sane and turn those "Defeat" screens into a "Victory."
📍🖱️Read more about Handling the Failure Burnout
📜FAQ / Quick Tips
Is Maisara Caverns in the current Mythic+ pool?
Yes. It is one of the Midnight Season 1 dungeons.
What is the most annoying non-boss hazard here?
For many groups, it is the combination of Lost Souls and bridge pressure. They are easy to underestimate, and they punish that immediately.
What usually wipes groups on the first boss?
Bad damage split, poor trap handling, or tanks getting awkwardly launched into danger during Flanking Spear.
What should healers watch the most?
Healing absorbs and overlap pressure on trash, Vordaza’s phantom damage combined with ambient boss damage, and Rak'tul’s constant pressure during the bridge run.
Any small dungeon note worth knowing?
Yes. The opening route includes side buffs, and Ritual Concoction was adjusted in March 2026 to last longer and persist through death, though it also hits less hard now.
LIVE LONG, PLAY WOW

✎ᝰ About the Author
Noob Sidious is a veteran World of Warcraft player, husband, and father. With a few years of experience working in technology, including QA engineering, programming, and data analysis, Noob Sidious brings a unique blend of gaming expertise and tech-savvy humor to the WoW community. Known for his sarcastic wit, he turns even the most epic wipe into a legendary tale. When he's not dominating Azeroth or cracking jokes, you’ll find him balancing family life and crafting content that entertains, educates, and connects WoW players, all while embodying the Emperor’s style.


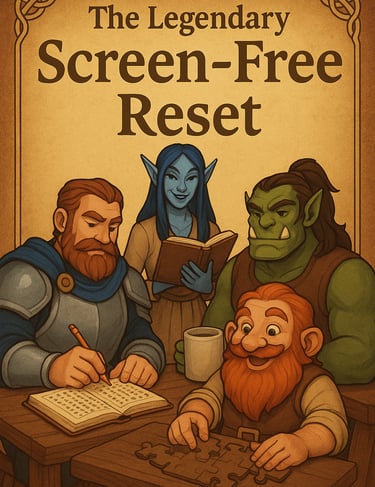
✨ Legendary Screen-Free Reset ✨
The Legendary Screen-Free Reset brings together fun, challenging, and themed word search puzzle books designed for relaxation, brain training, and entertainment.
And you will also support this project.
Perfect for adults, teens, and older kids, these puzzle books are created with easy-to-read print, making them accessible to casual solvers and puzzle lovers alike.
Whether you’re looking for a thoughtful gift, a screen-free activity, or just a way to unwind, the Legendary Screen-Free Reset is your best pick.
❤️ Maintaining this PROJECT takes more mana than a Disc Priest in a 10-minute raid encounter. If you’ve found my guides helpful, AND LIKE THE PROJECT, consider tossing a Major Mana Potion (or some real-world gold) my way to keep the servers running!
© 2025 WoWPrime. All rights reserved. Live Long, Play WOW
⚠️ Disclaimer
wowprimer.com is an independent, fan-driven project created for entertainment, commentary, and educational purposes. We are not affiliated with, endorsed by, or officially connected to Blizzard Entertainment, World of Warcraft, or any other companies mentioned on this site, unless explicitly stated.
All trademarks, copyrights, logos, names, and images are the property of their respective owners. Any use of these elements is made under Fair Use principles for the purposes of review, commentary, news reporting, and non-commercial fan expression.
Some articles, reviews, or recommendations may contain affiliate links or sponsored mentions. If you click on these links and make a purchase, we may earn a small commission at no additional cost to you. We only feature products, services, or experiences we genuinely believe may be of interest or value to our readers.
All content is provided “as is” for informational and entertainment purposes only and should NOT be considered official advice, endorsement, or representation of any third-party company.
SUBSCRIBE
We accept USDT or any token on the BNB Smart Chain.